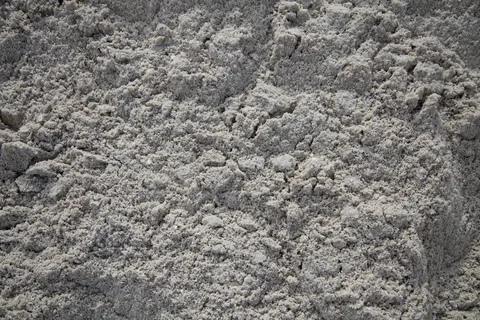
How to build a Beach Volleyball court in your Backyard

Contractor X

Easy steps to create a color palette

Lorem ipsum dolor sit amet, consectetur adipiscing elit. Integer libero molestie gravida morbi aliquam, dui neque pharetra. Egestas accumsan, potenti pulvinar nisl a turpis sit sed vitae netus sed quis eget sed nunc ac faucibus lacus arcu aliquet lorem ut mauris amet tempor nunc sed cursus integer eget tellus in eu a est.

  • Neque sodales ut etiam sit amet nisl purus. Non tellus orci ac auctor.
  • Adipiscing elit ut aliquam purus sit amet. Viverra suspendisse potenti.
  • Mauris commodo quis imperdiet massa tincidunt nunc pulvinar.

What is a color palette?

Lorem ipsum dolor sit amet, consectetur adipiscing elit ac varius duis sed amet arcu pellentesque ipsum dui, pellentesque facilisis vitae feugiat dui vel quis consectetur sed aliquet platea nulla varius dignissim eget vel in nec nulla mauris at amet vitae pharetra id lectus rhoncus, erat sed.

Why defining interior color schemes is so important

Lorem ipsum dolor sit amet, consectetur adipiscing elit commodo risus eget feugiat amet pellentesque massa morbi in montes, pharetra id sagittis, sed. Id consequat nam egestas enim eu elementum sed at nibh.

  1. Neque sodales ut etiam sit amet nisl purus non tellus orci .
  2. Adipiscing elit ut aliquam purus sit amet viverra .
  3. Mauris commodo quis imperdiet massa tincidunt nunc.
  4. Adipiscing elit ut aliquam purus sit amet viverra suspendisse.

Why defining interior color schemes is so important

Nisi quis eleifend quam adipiscing vitae. Aliquet bibendum enim facilisis gravida neque. Velit euismod in pellentesque massa placerat. Volutpat lacus laoreet non curabitur gravida. Odio aenean sed adipiscing diam donec adipiscing tristique risus. Amet est placerat in egestas erat imperdiet sed euismod nisi.

What is your favorite color palette?

Eget lorem dolor sed viverra ipsum nunc aliquet bibendum. Felis donec et odio pellentesque diam volutpat commodo sed egestas. Aliquam sem fringilla ut morbi tincidunt augue interdum velit euismod. Eu tincidunt tortor aliquam nulla facilisi. Aenean sed adipiscing diam donec adipiscing. Ut lectus arcu bibendum at varius.

Beach volleyball is more than just a sport because it is an experience. It has fast-paced action, and the sun-soaked fun makes it easy to love. Many enthusiasts dream of having their own sand volleyball court, whether it is for recreation or competitive training. Building a court can transform any outdoor space into a great activity hub, but it needs to be done right and with the right materials. That's why it's important to understand the process to make sure you get the result you're looking for.

Tools Needed:

  • Gas-Powered Tamper & Hand Tampers: Compacting the ground and ensuring a stable foundation.
  • Shovels (Small and Large): Moving dirt and sand during levelling and filling.
  • Gravel Rakes: Spread gravel and sand evenly.
  • Soft-Faced Mallets: Placing and leveling retaining wall blocks.
  • Wheelbarrow: Transporting materials like gravel, sand, and dirt.
  • Skid Steer: Recommended for transportation, land clearing, or digging if available.

Materials Needed:

  • Black Road Fabric: Prevents weed growth and ensures proper drainage.
  • Dirt: Levels the ground before construction.
  • Gravel: Optional, based on site drainage needs.
  • Rip Rap Stone: Supports pitched wall areas.
  • Retaining Wall Block: Use concrete blocks or 6×6 pressure-treated wood.
  • Sand: ~190 tons of beach sand to reduce dust and compaction.

Choose the Right Location

The first thing you need to do is choose the perfect spot. It is important to line up the court from north to south. This setup helps to reduce glare from the sun as it rises and sets, which makes sure that gameplay is uninterrupted. It's best to steer clear of areas with low-hanging branches or overhead wires to make sure the space is safe and unobstructed.

Understand the Court Dimensions

For a standard doubles beach volleyball court, the recommended dimensions are twenty-six feet three inches by fifty-two feet six inches. When building for juniors, collegiate games, or professional use, additional free space is required.

  • Juniors need nine feet ten inches of free space.
  • Collegiate courts require fifteen feet of free space.
  • Professional courts need nineteen feet six inches of free space.

When the court is for personal or recreational use, these requirements are flexible. You need to ensure there is enough room and maintain nine feet of clear space around the court.

Excavation and Drainage

Proper drainage is critical to make sure the court remains playable after it rains. Here are the steps to prepare the space:

  • Check for Utilities: Confirm there are no underground utilities or power lines in the chosen area before digging.
  • Excavate the Area: Dig to a depth of one and a half to three feet, depending on your drainage needs. Use equipment like a Bobcat or front-end loader for faster excavation.
  • Install a Drainage System: Create a slope toward the lowest point of the court. Lay a perforated drainage pipe wrapped in landscaping fabric along this slope. The fabric prevents clogging and keeps the sand dry and playable.

Selecting and Delivering the Sand

It is really important to choose the right sand because it makes sure that players are safe and helps them perform better. It is best to use clean sand with rounded particles, as this reduces the risk of injuries. Calculate the volleyball beach sand cost based on the court size and the depth of sand you require. Most courts need one to two feet of sand, which equals several tons.

Coordinate volleyball sand delivery with a reliable supplier to ensure high-quality sand arrives on time. To explore high-quality options, visit Western Materials for their range of volleyball beach sand.

Setting Up the Poles

The poles of your court must be sturdy and safe. Use poles made of galvanized steel, stainless steel, anodized aluminium, or treated wood. Here is how to install them:

  • Place the poles twenty-nine to thirty-six feet apart, depending on whether the court is for recreational or competitive use.
  • Dig holes that are three feet deep and one foot in diameter.
  • Anchor the poles securely with concrete if they are metal. Avoid using concrete with wooden poles because this may cause deterioration over time.

Add padding to the poles to ensure players are protected during games.

Laying the Base and Filling with Sand

The base layer provides stability and ensures proper drainage for your court:

  1. Spread four to six inches of small drainage gravel evenly across the court.
  2. Cover the gravel with landscaping fabric to prevent it from mixing with the sand.
  3. Add one to two feet of sand on top of the fabric. Spread the sand evenly using a rake or shovel.

Final Touches

A volleyball court is incomplete without boundary lines and a net. You can use tape or rope to mark the boundaries, but remember that rope can cause burns if players trip. Install a durable net at the correct height to complete your setup.

Conclusion:

If building a court feels overwhelming, then you do not have to do it alone. You can simplify the process by getting help from experts, who can handle everything from planning to installation and also ensure that the court meets all specifications and is ready to use.

Your dream of owning a sand volleyball court can become a reality with proper planning, quality materials, and professional help. So, gather your friends and enjoy the thrill of beach volleyball right at home!

How to build a Beach Volleyball court in your Backyard

Published on:

December 4, 2024

Beach volleyball is more than just a sport because it is an experience. It has fast-paced action, and the sun-soaked fun makes it easy to love. Many enthusiasts dream of having their own sand volleyball court, whether it is for recreation or competitive training. Building a court can transform any outdoor space into a great activity hub, but it needs to be done right and with the right materials. That's why it's important to understand the process to make sure you get the result you're looking for.

Tools Needed:

  • Gas-Powered Tamper & Hand Tampers: Compacting the ground and ensuring a stable foundation.
  • Shovels (Small and Large): Moving dirt and sand during levelling and filling.
  • Gravel Rakes: Spread gravel and sand evenly.
  • Soft-Faced Mallets: Placing and leveling retaining wall blocks.
  • Wheelbarrow: Transporting materials like gravel, sand, and dirt.
  • Skid Steer: Recommended for transportation, land clearing, or digging if available.

Materials Needed:

  • Black Road Fabric: Prevents weed growth and ensures proper drainage.
  • Dirt: Levels the ground before construction.
  • Gravel: Optional, based on site drainage needs.
  • Rip Rap Stone: Supports pitched wall areas.
  • Retaining Wall Block: Use concrete blocks or 6×6 pressure-treated wood.
  • Sand: ~190 tons of beach sand to reduce dust and compaction.

Choose the Right Location

The first thing you need to do is choose the perfect spot. It is important to line up the court from north to south. This setup helps to reduce glare from the sun as it rises and sets, which makes sure that gameplay is uninterrupted. It's best to steer clear of areas with low-hanging branches or overhead wires to make sure the space is safe and unobstructed.

Understand the Court Dimensions

For a standard doubles beach volleyball court, the recommended dimensions are twenty-six feet three inches by fifty-two feet six inches. When building for juniors, collegiate games, or professional use, additional free space is required.

  • Juniors need nine feet ten inches of free space.
  • Collegiate courts require fifteen feet of free space.
  • Professional courts need nineteen feet six inches of free space.

When the court is for personal or recreational use, these requirements are flexible. You need to ensure there is enough room and maintain nine feet of clear space around the court.

Excavation and Drainage

Proper drainage is critical to make sure the court remains playable after it rains. Here are the steps to prepare the space:

  • Check for Utilities: Confirm there are no underground utilities or power lines in the chosen area before digging.
  • Excavate the Area: Dig to a depth of one and a half to three feet, depending on your drainage needs. Use equipment like a Bobcat or front-end loader for faster excavation.
  • Install a Drainage System: Create a slope toward the lowest point of the court. Lay a perforated drainage pipe wrapped in landscaping fabric along this slope. The fabric prevents clogging and keeps the sand dry and playable.

Selecting and Delivering the Sand

It is really important to choose the right sand because it makes sure that players are safe and helps them perform better. It is best to use clean sand with rounded particles, as this reduces the risk of injuries. Calculate the volleyball beach sand cost based on the court size and the depth of sand you require. Most courts need one to two feet of sand, which equals several tons.

Coordinate volleyball sand delivery with a reliable supplier to ensure high-quality sand arrives on time. To explore high-quality options, visit Western Materials for their range of volleyball beach sand.

Setting Up the Poles

The poles of your court must be sturdy and safe. Use poles made of galvanized steel, stainless steel, anodized aluminium, or treated wood. Here is how to install them:

  • Place the poles twenty-nine to thirty-six feet apart, depending on whether the court is for recreational or competitive use.
  • Dig holes that are three feet deep and one foot in diameter.
  • Anchor the poles securely with concrete if they are metal. Avoid using concrete with wooden poles because this may cause deterioration over time.

Add padding to the poles to ensure players are protected during games.

Laying the Base and Filling with Sand

The base layer provides stability and ensures proper drainage for your court:

  1. Spread four to six inches of small drainage gravel evenly across the court.
  2. Cover the gravel with landscaping fabric to prevent it from mixing with the sand.
  3. Add one to two feet of sand on top of the fabric. Spread the sand evenly using a rake or shovel.

Final Touches

A volleyball court is incomplete without boundary lines and a net. You can use tape or rope to mark the boundaries, but remember that rope can cause burns if players trip. Install a durable net at the correct height to complete your setup.

Conclusion:

If building a court feels overwhelming, then you do not have to do it alone. You can simplify the process by getting help from experts, who can handle everything from planning to installation and also ensure that the court meets all specifications and is ready to use.

Your dream of owning a sand volleyball court can become a reality with proper planning, quality materials, and professional help. So, gather your friends and enjoy the thrill of beach volleyball right at home!